 I’m finally getting around to posting photos of a restoration and upcycle project I began last year. It all begin with this awesome pair of vintage Mid Century teak chairs I purchased off of Craigslist. The cane backing was in mint condition, and, with the exception of a small part of the arm that needed repair, had great bones, so I knew I had to have them.
Here is one before, I’d already started to scrape off some of the old gunky finish that had turned black on the arms prior to taking this photo. I used a razor blade, and had to keep from scraping the wood, and scrape just deep enough to get the finish off. This took a few days, due to my needing to walk away in frustration a few times. I only did this in the most worn areas, already planning to match the finish later. It had on the original navy leather cushions. I believe these chairs may of been used in a bank office.

Then I took the seat out, cleaned the cane back and everything else, and sanded the chairs by hand. Then I finished by brushing on a clear finish.


I determined that the leather was in excellent condition, and as firm as one could wish. Rather than remove, I decided to just cover the leather cushions.
Next, I needed to find the perfect upholstery material. My first choice was handmade, would have to be imported from the U.K., and way beyond my budget. Armed with a coupon I’d recently received I took a drive to Jo-Ann Fabric and Crafts Store in search of the yet to be determined fabric. There, among a great selection of prints and solids, I found it. It was HGTV’s Groove Move print in turquoise. It was meant to be.


I measured the seats. Then I cut the fabric, allowing enough fabric to wrap around the cushions and staple onto the plywood on the bottom. I did not need to use any type of spray adhesive. The seats were firm and the fabric I’d purchased was thick enough that I did not need to worry about it tearing away from staples. So, I just wrapped the cushions and stapled, being sure to fold the corners over the same way on both cushions, to the side, so they did not show on the front. Then the cushions were ready to screw into the frame, and complete. While browsing yard sales, someone had offered me a vintage Lane teak side table that had very similar lines for free. A deal I would not refuse. I also found a great vintage crackle glass lamp (shown) at a local thrift store for only seven dollars, it just needed a shade and a bit of touch up bronze paint on the top finial.
I still find the lines of the chairs draw me in every time I look at them. I love how beautifully they turned out, and I know they are pieces unique to my home.


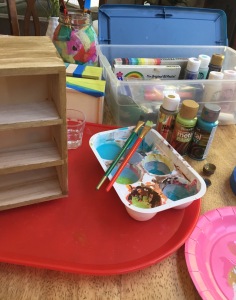
 I came across a cute inexpensive raw wood jewelry box at a Michaels craft store and couldn’t resist. I already had several acrylic craft paints. I chose three from among those favorite colors. So, all that was needed was paint, brushes, and water. However, I’d been hanging on to some beautiful ceramic pieces created by my friend I’d met through Etsy, Ginny. They were perfect for this project. Before I began painting, I worked the little wooden knobs out of the four drawers. They wouldn’t be needed. I had something better in mind. Once everything dried, all painted areas were sealed by brushing with a clear satin gloss. Then it was time to pull out my hot glue gun. A ceramic domed disk was attached to each drawer to form the knobs. They were just right. It was a lovely few hours with my coffee, a peaceful Fall playlist, and the project at hand. Although I love the final result, the best part of this project was the time I spent so absorbed in what I was working on that all my cares slipped away. I hope you can make time and find something to paint, upcycle, or create and enjoy a little carefree time too. I guarantee it’s worth it


