DIY Weekend: Macrame is A-Okay

Yes, I can admit that I’m a seventies baby and anything macrame always makes me smile. Now, I don’t have to hide my fondness because the trend is back. I’m not sharing a tutorial because there are hundreds (possibly thousands) of excellent tutorials online and on YouTube. I’ve “pinned” several looks I liked and then turned to google searching to educate myself on a few basics.

There’s a big blank space of wall over my headboard and i thought a large macrame focal would look great, but first I wanted to make sure I actually enjoyed the process of creating a macrame piece prior to making any investment. I’ve had a piece of driftwood I found several years ago and could never part with and some yarn I already had on hand.

For my first attempt, I’m pleased with how this piece turned out. I have learned several macrame knots and have a few first timer tips. First of all, a nice straight stick, pole, whatever would of been much simpler than uneven driftwood for a beginner project. I kept having to readjust to make it even. Also, wool yarn is not so great. It wants to tangle and doesn’t glide. In contrast the silk yarn was perfection. However, silk would be extremely pricy for a large project. I can see why rope is used, my hands got pretty tired from tying all those tiny knots.

I’ve also learned that the majority of my crafting supplies I’ve accumulated over the years tend to be in my favorites colors, mainly shades of green.

A few months back I’d also done a basic plant hanger for my ever expanding pothos and I really love how it turned out as well (photo below) I found macrame to be an enjoyable craft, and hope to get to work on that larger piece soon.

What is your plan for your next DIY weekend project?

DIY Weekend: Painted Jewelry Box

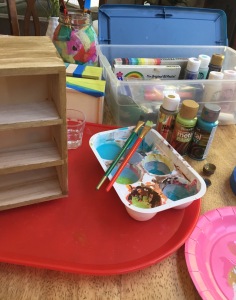
I came across a cute inexpensive raw wood jewelry box at a Michaels craft store and couldn’t resist. I already had several acrylic craft paints. I chose three from among those favorite colors. So, all that was needed was paint, brushes, and water. However, I’d been hanging on to some beautiful ceramic pieces created by my friend I’d met through Etsy, Ginny. They were perfect for this project. Before I began painting, I worked the little wooden knobs out of the four drawers. They wouldn’t be needed. I had something better in mind. Once everything dried, all painted areas were sealed by brushing with a clear satin gloss. Then it was time to pull out my hot glue gun. A ceramic domed disk was attached to each drawer to form the knobs. They were just right. It was a lovely few hours with my coffee, a peaceful Fall playlist, and the project at hand. Although I love the final result, the best part of this project was the time I spent so absorbed in what I was working on that all my cares slipped away. I hope you can make time and find something to paint, upcycle, or create and enjoy a little carefree time too. I guarantee it’s worth it
img_5893

The box can be found at

http://www.michaels.com/artminds-wooden-4-drawer-box/10397770.html


img_5869

Spring Clearing Event May 1-7

2ndetsylargebannerSpring Clearing SaleMay 1-7

UPDATE II: Spring Clearing event has closed, thank you everyone for your support!

UPDATE: SALE IS LIVE SHOP NOW and enter promo code: SPRINGEVENT for 50% all items at Go2GirlDesigns.com

It’s that time of year- Spring Clearing. You know what I’m talking about, don’t you? I’m feeling the drive to start fresh, reorganize, regroup. I’ve done it throughout my heart and home and now it’s time to work on my business.

I’ve decided I would make this a postive experience for myself and my jewelry design fans. I’m going to be doing a promotion to clear out all of my ready to ship designs. This is your opportunity to select handcrafted accessories to compliment your spring wardrobe at a great price.

I need your help in sharing this with others who you know will love to be introduced to my handcrafted jewelry designs. Many of the pieces are one of a kind so it will also be a limited supply sale. You can attend the event on Facebook by Joining the Events group or read more about it and share on my Facebook Page here: https://www.facebook.com/Go2GirlDesigns

Thank you so much!

As Seen on CW6 San Diego Living

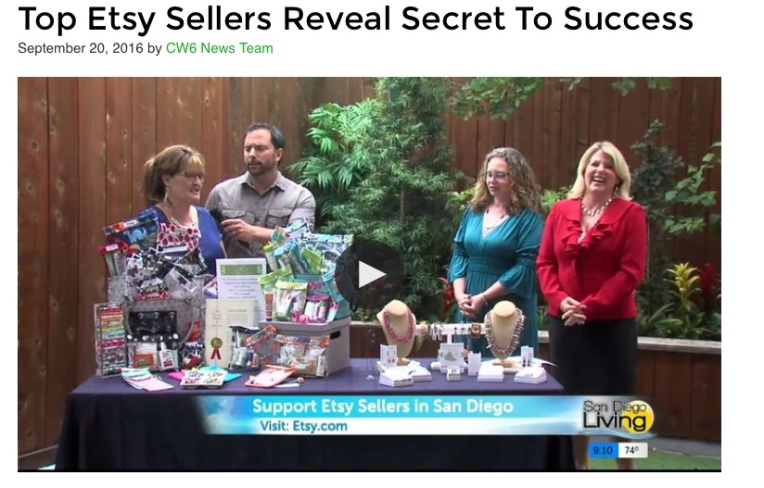
I was blessed, I can say that now after several days of trying to not appear on television, to be invited to share my jewelry and a bit about Etsy (one of the venue’s I use to sell my jewelry) on our local CW6 San Diego Living.  I met some lovely individuals, and it was a great experience for me.  As I tried to explain to someone yesterday, it gave me that same feeling in the pit of my stomach you get when you are about to drop on a rollercoaster or zip line, and yet you are rewarded with the little adrenalin rush and exhilaration of accomplishment after it’s over.  I don’t know that I would do it again, but I’m glad I did.  My instinct was to hide, and then I decided I would share in the excitement my friends and supporters feel for me and just enjoy it. So, here it is for anyone who would like to take a peek at the likely beginning and end of my television career. 

cw6-san-diego-living-screenshot-copy
Click to View

Blessings in Creation, Seaside

seagullsstockphoto

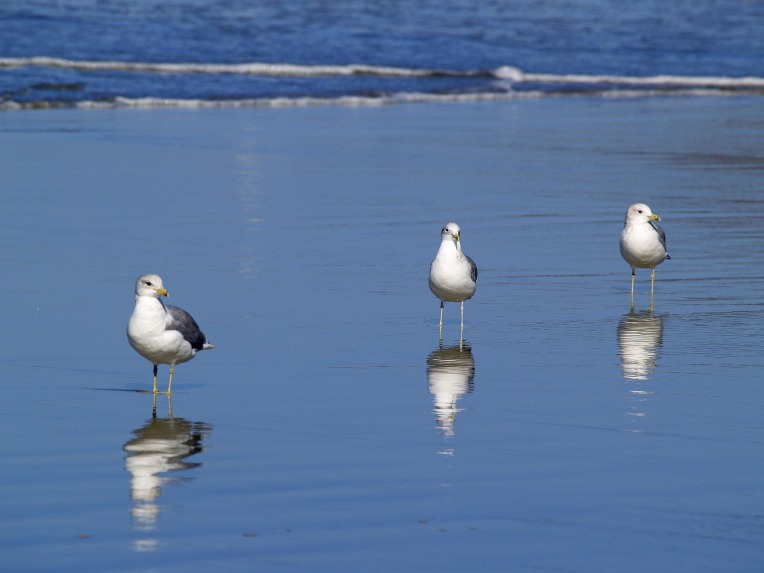
This morning after I dropped my daughter off at school I just did not feel like going home. What did I feel like? I decided to drive down to the coast in Del Mar. I found a great parking spot with an expansive view of the Pacific. Right away I noticed a couple dolphins frolicking in the surf, and then several more went by.  Some of the dolphins were swimming near a big gray blur and, although I thought I saw a spray of water shoot up, at first dismissed it as my usual imagining of spotting a whale. I popped out of my car and hopped onto a large rock on the roadside. Yes, a gray whale! There may of been two. I thought I saw a smaller one, but it disappeared. I was thrilled, but it was early and there were few people around, and none seemed to be noticing. Then, it shot its head right out of the water, beautiful creature. A little behind the others in its migration. I’m a slow traveler myself, always wanting to stop and explore, so I get that. I was thrilled and talking to myself with no one to share it with. After about twenty minutes of this solo viewing, a few people started to notice and came over to chat with me. One more vertical appearance from the whale and then things started to quiet. A few more dolphins in the distance.  I wished one of the ladies I’d been chatting with a beautiful day and she gave me a “God bless you” and we parted ways as I walked down to the shore and popped my sandals off. Time for a walk.

It was overcast and yet not cold, a glorious morning for a long stroll.  The brisk salt water streaming over my toes was so refreshing. Pelicans dove, dipped, and floated contentedly on the water, bellies full. One dove down right in front of me, beak pointed like an arrow sure to hit the target, it went under water and was up as quickly, then it gulped down its reward. Wow.

I went along completely thankful for a morning that was so full of gifts. I spotted a photographer spying the bluffs, alternating between his big camera and binoculars. Ever curious, I just had to ask what could be so interesting, wasn’t it all to be found by facing toward the ocean, not behind us?  He first said “It’s a secret!” and then laughed. I was let in on the “secret”. A falcon, Peregrine Falcon, was nesting above. I watched it swoop and soar and reclaim her perch upon a bluff.  The kind photographer generously offered me his binoculars and I saw her, beautiful. Her spotted chest looked soft, a perfect warm blanket for her babies.  I could tell the man was anxious to get back to his work and so I only took a moment and let him resume. I was grateful for this strangers kindness in sharing. Here are some of his photos, he’s very talented www.pbase.com/herb1rm/peregrine_falcons .

I finished my walk , finding a heart shaped rock just lying in the sand waiting for me (I had already determined I would not be collecting rocks or shells today), and I had to keep it. My senses were full with appreciation for the gift of creation that surrounded me. I needed no photos to remember it all.

On the drive home I rolled down the cars windows, blasted the radio (all the right songs happened to be on, really ). With a smile and a prayerful spirit, I wondered at how my morning was so blessed.


DIY Weekend: 20 Minute Necklace Display

img_0433

This is a quick and simple DIY I had to share. I know there are so many bigger projects one can tackle on a weekend, but, if your like me, you often need the weekend to rest, spend time with family and friends, and take care of household responsibilities. This is perfect for satisfying the desire to be crafty within a small time frame.

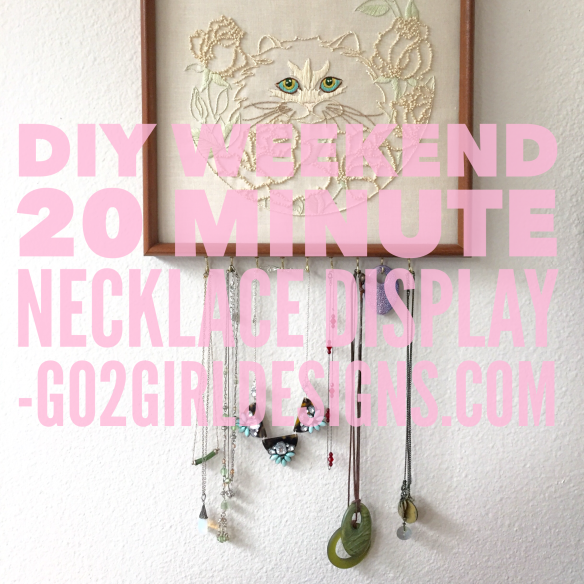
I wanted a necklace display to pair with the earring display I’d made (see this post).  I was just waiting to find a mirror or frame that caught my eye.  This little hand embroidered garage sale gem was a great find at under three dollars.

No real instructions needed. Just grab some screw in hooks at your local hardware store. I purchased the smallest that I could find, sold as 5/8″ Cup Hooks.

Screw into base of frame, make sure the piece you choose to work with has a nice flat surface for screws, and that you only screw in to depth that will not break through the other side. I used a ruler and marked equal spacing for screws in advance and worked from the center out, adding a screw to each side of center and out just to keep it all even. Hang it, add your necklaces. How easy is that?  I think I’m thrilled with the result. Functional, visually appealing, and affordable.

necklacedisplaycat

I’d love to see a photo or comments if you try this yourself.

DIY Weekend: Ikea Hack Tea Chest and Stationary Storage

I thought this was a great hack to share using Ikea’s Moppe chest. I do not could not find them currently on the U.S. website, you may need to request it in your local store. I had purchased mine a few years ago and came across some great hacks using them on Pinterest. My favorite was the tea chests. I’ve got quite the stash of teas. There was such a diverse creative style (using knobs and labels and a variety of colors), I just thought I’d pull my two out and have fun. It makes a great DIY Weekend project when you can have your children working side by side on their own projects as well. It’s nice to have company, to give each other input, and just makes for some good creative family time.

I’d like to mention, that there is quite a bit of assembly required on these little chests, it comes broken down and packed flat. That could possibly of been the reason I chose to leave them as is after assembly. I was done.

I had used one for stationary and one was not really being used for much.

The first one, that I used for stationary I just played around with and decided to do a light color block pattern with Aqua , lime green  , and brown acrylic craft paint. Then I sealed over with a clear finish. So simple.

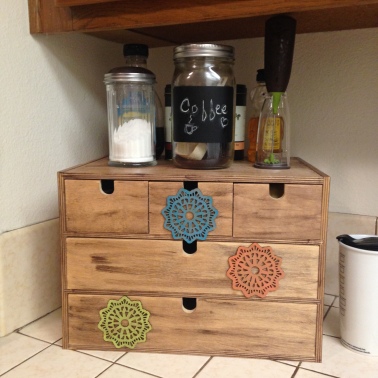
The tea chest is really my favorite. I wanted a little more warmth and depth with this so I used warmer colors, and few simple unpainted appliqués from Michaels Craft Store. I rubbed a diluted brown paint into the grain on the top and sides. While that was drying,  I pulled out the drawers and did a similar wash with the colors I wanted on the face and appliqués.  Once it all dried, sparingly using gold paint diluted with water, I rubbed it over the appliqués and select areas just to give it more of an aged look.  I covered it all with a clear finish.

You really can’t go wrong with such a simple project and now that drab chest of drawers that is one of my most used an favorite storage pieces in my home. A simple and functional DIY weekend,  give it a try.


Upcycle Reupholstery Project Mid Century Teak Chairs

IMG_9893I’m finally getting around to posting photos of a restoration and upcycle project I began last year. It all begin with this awesome pair of vintage Mid Century teak chairs I purchased off of Craigslist. The cane backing was in mint condition, and, with the exception of  a small part of the arm that needed repair, had great bones, so I knew I had to have them.

Here is one before, I’d already started to scrape off some of the old gunky finish that had turned black on the arms prior to taking this photo.  I used a razor blade, and had to keep from scraping the wood, and scrape just deep enough to get the finish off. This took a few days, due to my needing to walk away in frustration a few times.  I only did this in the most worn areas, already planning to match the finish later. It had on the original navy leather cushions. I believe these chairs may of been used in a bank office.

IMG_9607

Then I took the seat out, cleaned the cane back and everything else, and sanded the chairs by hand. Then I finished by brushing on a clear finish.

IMG_9625 IMG_9622 IMG_9623

I determined that the leather was in excellent condition, and as firm as one could wish. Rather than remove, I decided to just cover the leather cushions.

Next, I needed to find the perfect upholstery material. My first choice was handmade, would have to be imported from the U.K., and way beyond my budget.  Armed with a coupon I’d recently received I took a drive to Jo-Ann Fabric and Crafts Store in search of the yet to be determined fabric. There, among a great selection of prints and solids, I found it. It was HGTV’s Groove Move print in turquoise. It was meant to be.

IMG_9620 IMG_9617

I measured the seats. Then I cut the fabric, allowing enough fabric to wrap around the cushions and staple onto the plywood on the bottom. I did not need to use any type of spray adhesive. The seats were firm and the fabric I’d purchased was thick enough that I did not need to worry about it tearing away from staples. So, I just wrapped the cushions and stapled, being sure to fold the corners over the same way on both cushions, to the side, so they did not show on the front. Then the cushions were ready to screw into the frame, and complete. While browsing yard sales, someone had offered me a vintage Lane teak side table that had very similar lines for free. A deal I would not refuse. I also found a great vintage crackle glass lamp (shown) at a local thrift store for only seven dollars, it just needed a shade and a bit of touch up bronze paint on the top finial.

I still find the lines of the chairs draw me in every time I look at them. I love how beautifully they turned out, and I know they are pieces unique to my home.

IMG_9893 IMG_0026